These guides provide detailed information about the self-service registration system, including videos that show how to use it.
Registering for a Basic Course
A basic course is defined in this guide as a course without a lab or waitlist.
Step 1. Go to OSCAR or through BuzzPort, the OSCAR Registration tab.
Step 2. Once on the OSCAR Registration landing page, select the top right option labeled, "Register for Classes".
Step 3. Login through the Georgia Tech login service.
Step 4. Select the term you wish to register.
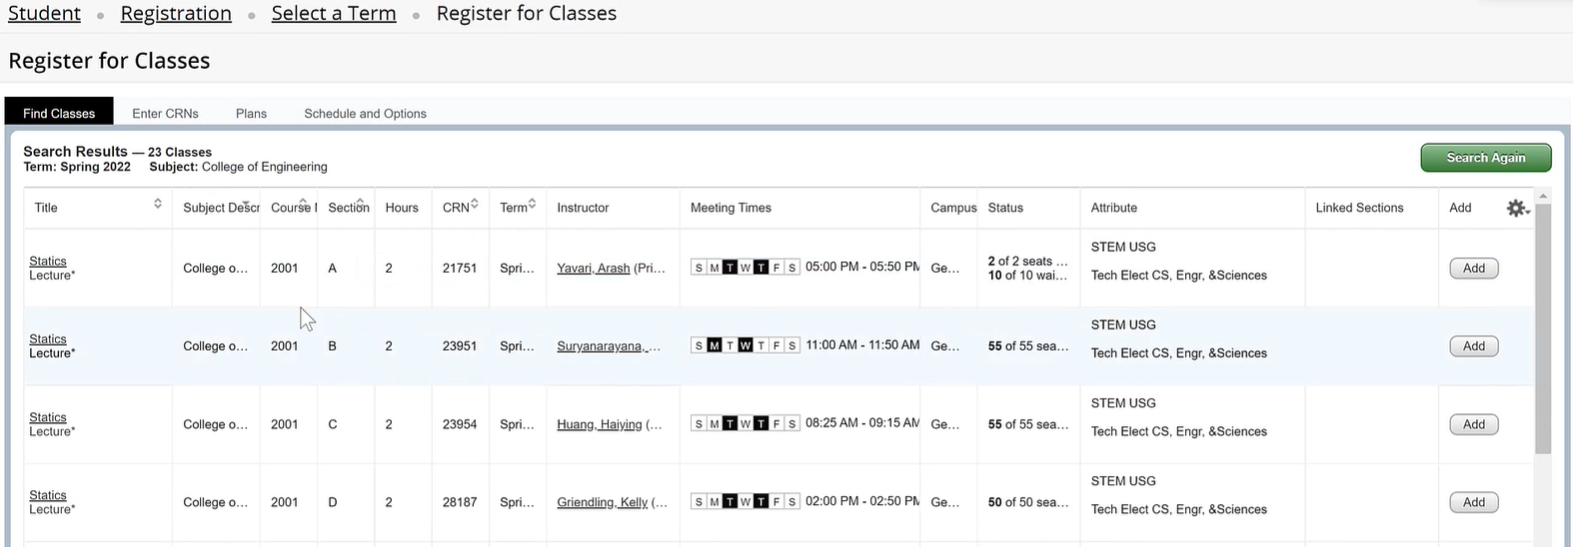
Step 5. There are several options to find your desired course. On the default tab, you will be able to search via subject (College or School), course number, or a keyword. You may switch tabs to the right of your current tab to search via CRN. You may also see the advanced search options to view by specific professors, campus, time slot, and more. You may also press search with no filled in information to see all courses during your selected semester.
Step 6. Once you have filled out your class information and pressed search, you will be taken to a search results page. This page shows all the available courses of your searched criteria during your chosen semester.
Step 7. View the courses and corresponding course information via the columns labeled by title, instructor(s), meeting times, seats available and more. You may expand the columns to show more information.
Step 8. Select your desired course by clicking "Add" on the far right column. This will show you how this course corresponds with your desired semester's current schedule.
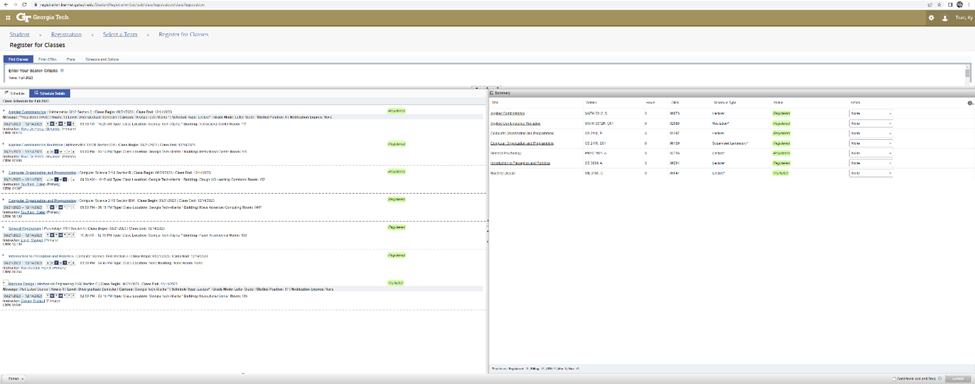
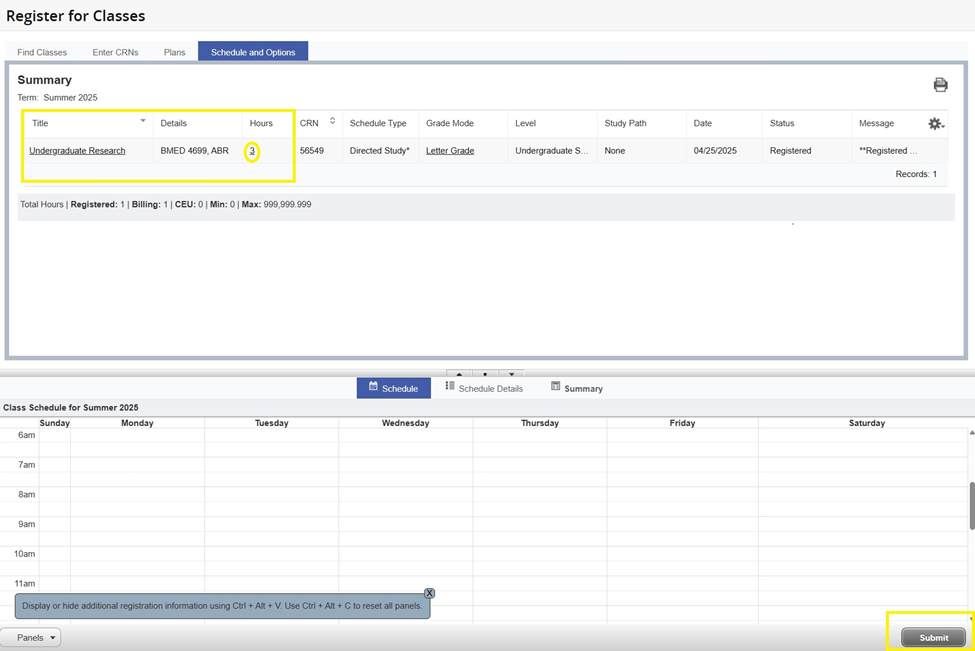
Step 9. View the panels on the bottom left and right to confirm the information is correct.
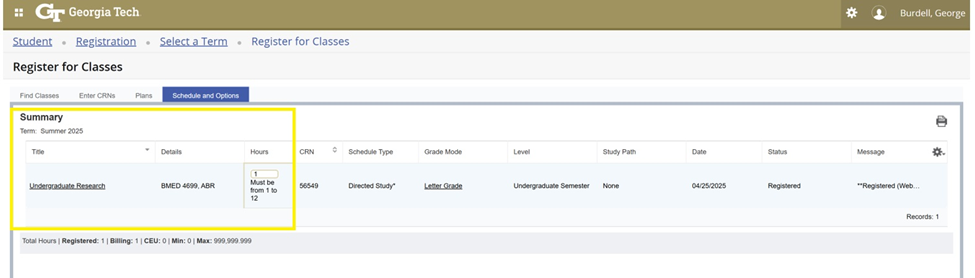
Step 10. If the information looks correct, go to the bottom right panel of your screen and you will see the course you selected labeled as “pending”. To apply for this course and complete your registration, be sure the pull down bar under the Action tab shows “**Register (Web)”, then click "Submit" at the bottom right of this panel. The course status should change from "Pending" to “Registered” in green text and the Action bar will now say “None”.
Video: Registering for a basic course
Registering for a Course with a Lab
(Note, steps 1 through 6 are the same as Registering for a basic course. Please see Step 7 if you are familiar with how to find courses in OSCAR.)
Step 1. Go to OSCAR or through BuzzPort, the OSCAR Registration tab.
Step 2. Once on the OSCAR Registration landing page, select the top right option labeled, “Register for Classes”.
Step 3. Login through the Georgia Tech login service.
Step 4. Select the term you wish to register.
Step 5. There are several options to find your desired course. On the default tab, you will be able to search via subject (College or School), course number, or a keyword. You may switch tabs to the right of your current tab to search via CRN. You may also see the advanced search options to view by specific professors, campus, time slot, and more. You may also press search with no filled in information to see all courses during your selected semester.
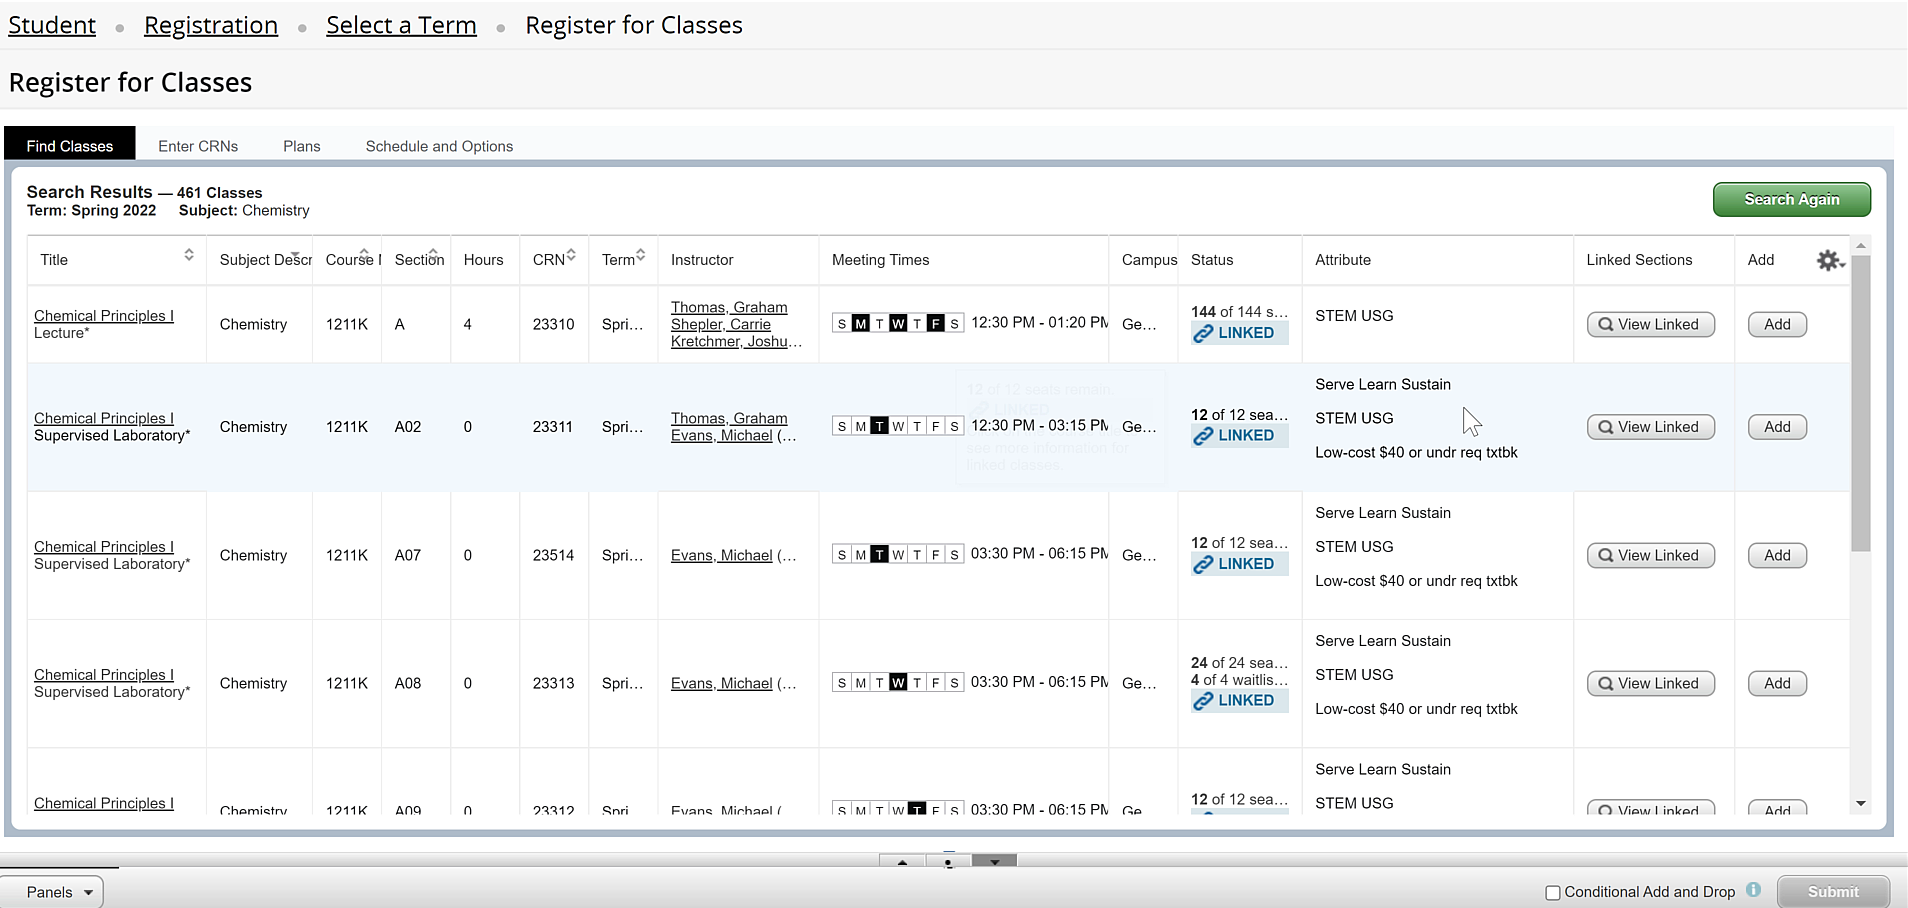
Step 6. Once you have filled out your class information and pressed search, you will be taken to a search results page. This page shows all the available courses of your searched criteria during your chosen semester.
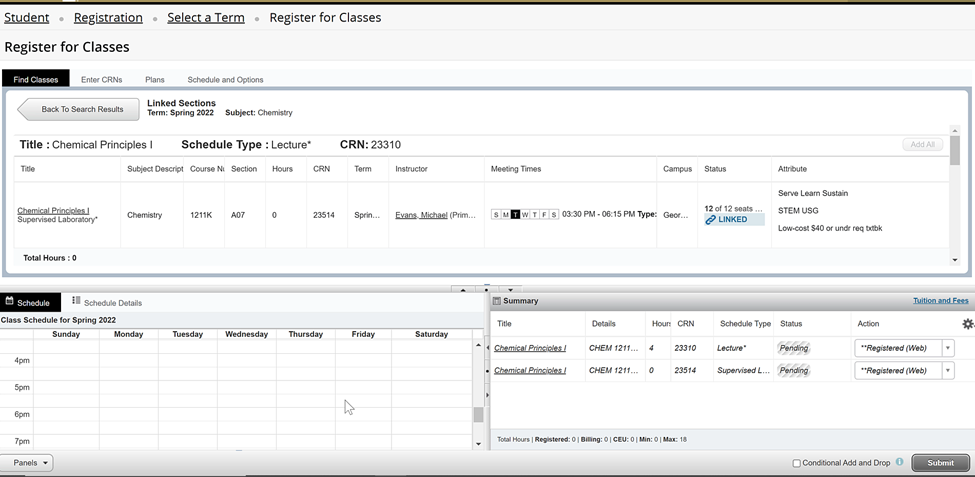
Step 7. For courses with labs, you should see the word “LINKED” in blue highlights with a linked symbol in the Status column (11th column).
Step 8. To see more information on the linked course, go to the Linked Sections column (the 13th column) and select the “View Linked” option in the row of the course you wish to inspect.
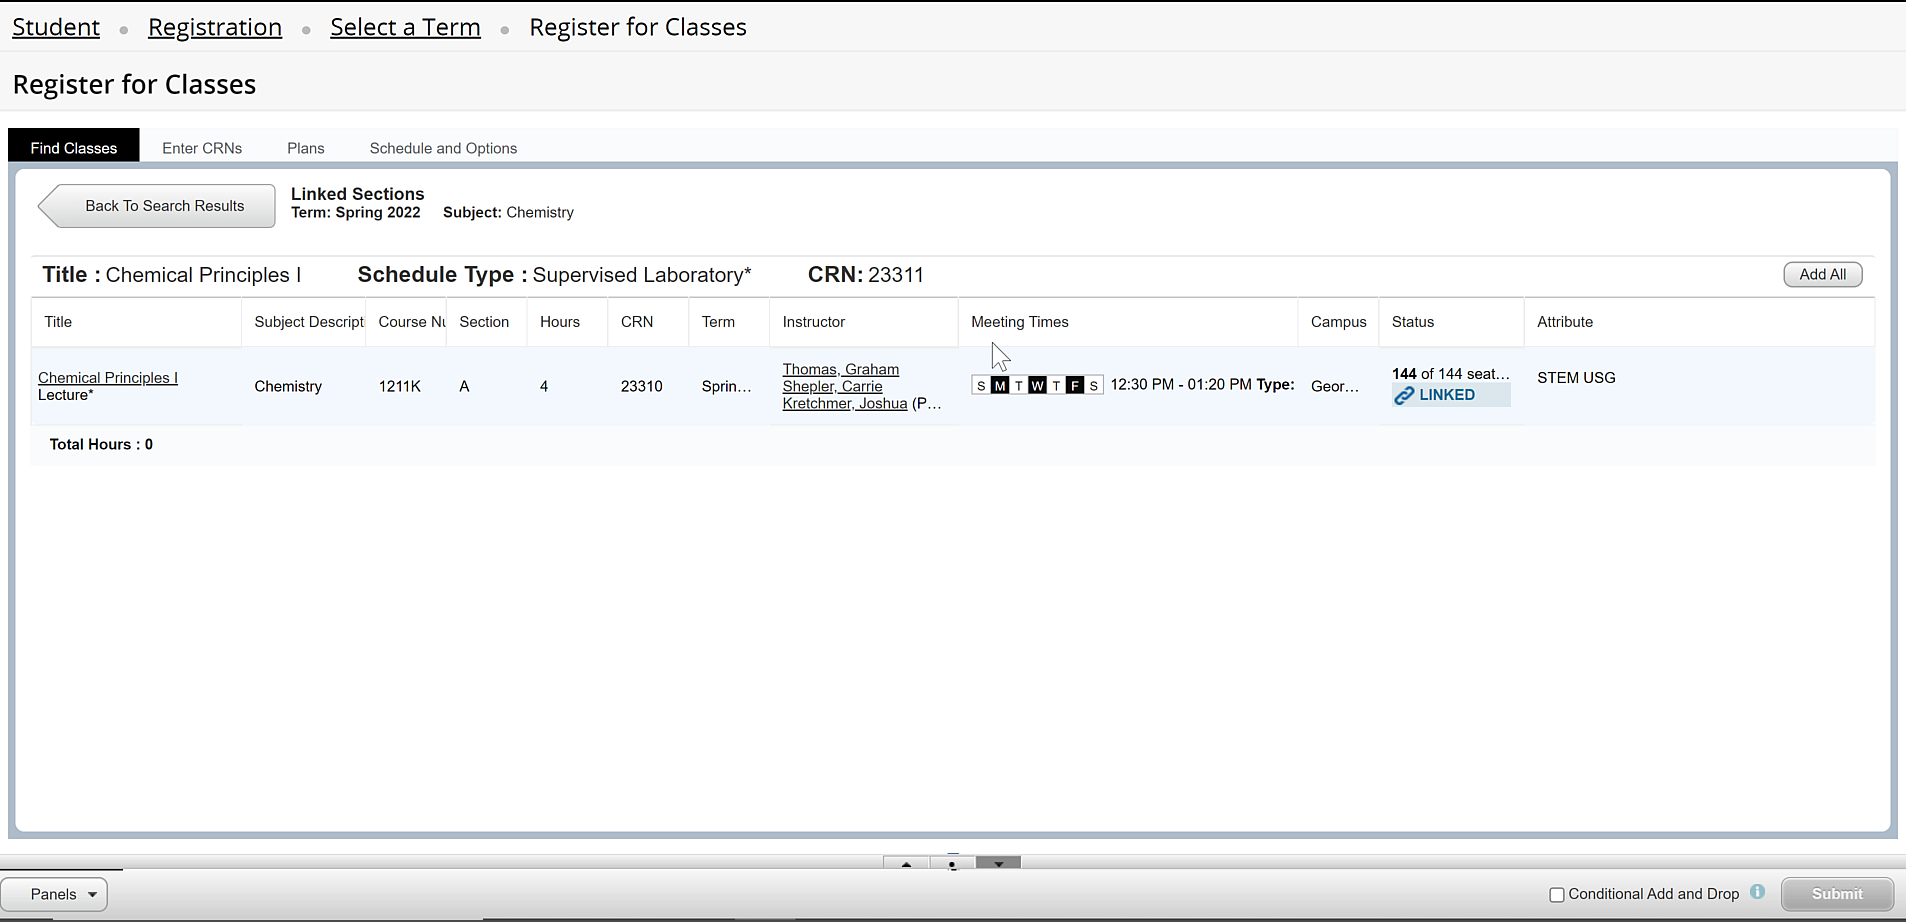
Step 9. Upon pressing "View Linked," you should see a new page with the linked course. This should be the corresponding lecture course for the specific lab course you selected. This only applies to the row of the lab course you selected, not all labs of this corresponding course.
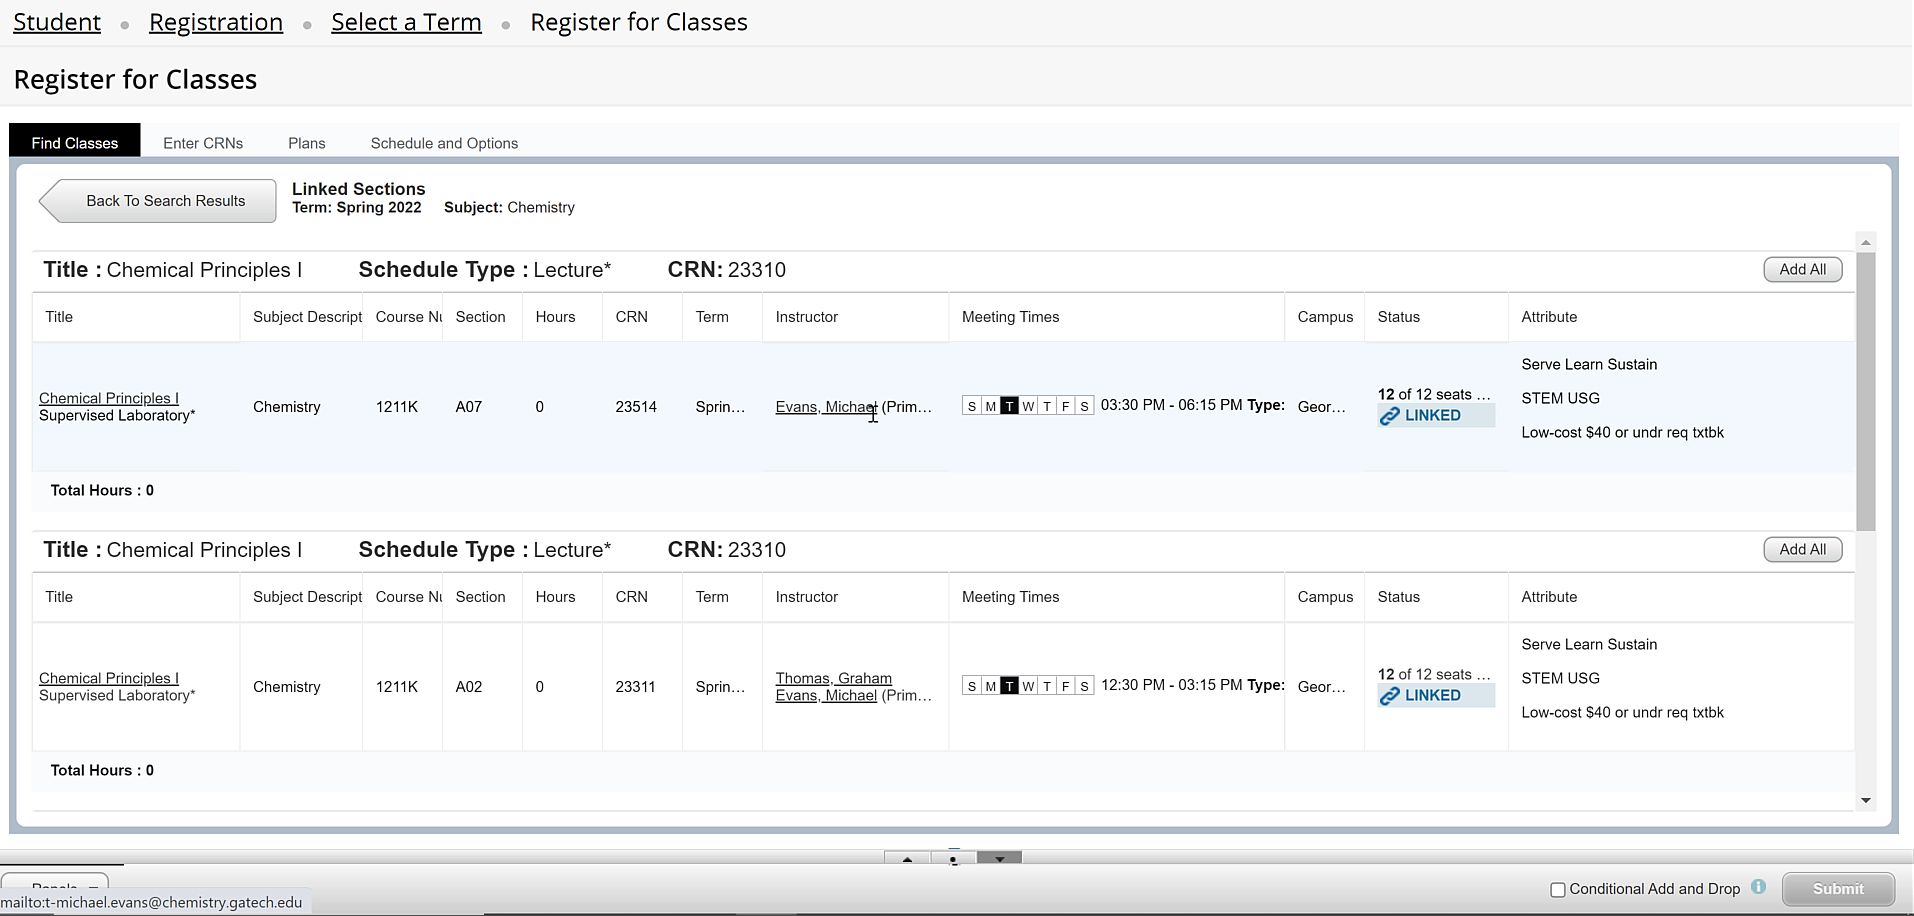
Step 10. You may click on the lecture course to the see corresponding lab courses as well using the same steps.
Step 11. There are typically multiple lab options for lecture courses.
Step 12. Lab and lecture courses are linked by Section letter (4th column). For example all lab courses starting with "A" in the Section column are linked with the lecture course with the letter "A" in the Section column.
Step 13. To see more information about the course, click the title link and a popup will appear entitled “Class Details for” followed by the CRN. You may also view linked sections from here by selected the Linked Section tab (14th tab listed).
Step 14. To register for a lecture and a linked lab course, click "View Linked" and choose your lab course. Choose "Add All" in the upper right of the Linked Sections panel. Be sure to double check you are selected the courses you want.
Step 15. Two panels should appear in the bottom half of your page which show Schedule and Summary of your classes. Review your course information once more to ensure your selections are correct.
Step 16. If the information looks correct, go to the bottom right panel of your screen and you will see the courses you selected labeled as “pending”. To apply for the lecture and lab courses and complete your registration, be sure the pull down bar under the Action tab shows “**Register (Web)”, then click Submit at the bottom right of this panel. The courses should show the status turn from pending to “Registered” in green text and the Action bar will now say “None”. This is how you know you have registered for the courses correctly.
Video: Registering for a course with a lab
Registering for a Course with a Waitlist
(Note, steps 1 through 6 are the same as Registering for a basic course. Please see Step 7 if you are familiar with how to find courses in OSCAR.)
Step 1. Go to OSCAR or through BuzzPort, the OSCAR Registration tab.
Step 2. Once on the OSCAR Registration landing page, select the top right option labeled, “Register for Classes”.
Step 3. Login through the Georgia Tech login service.
Step 4. Select the term you wish to register.
Step 5. There are several options to find your desired course. On the default tab, you will be able to search via subject (College or School), course number, or a keyword. You may switch tabs to the right of your current tab to search via CRN. You may also see the advanced search options to view by specific professors, campus, time slot, and more. You may also press search with no filled in information to see all courses during your selected semester.
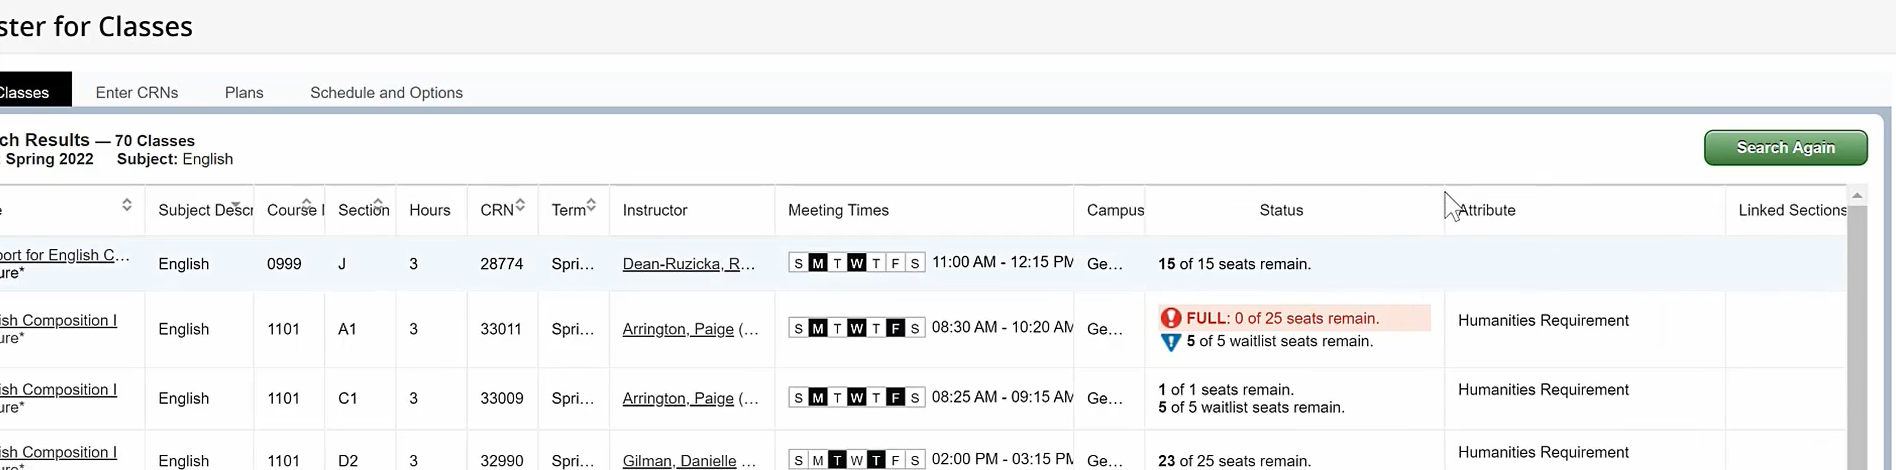
Step 6. Once you have filled out your class information and pressed search, you will be taken to a search results page. This page shows all the available courses of your searched criteria during your chosen semester.
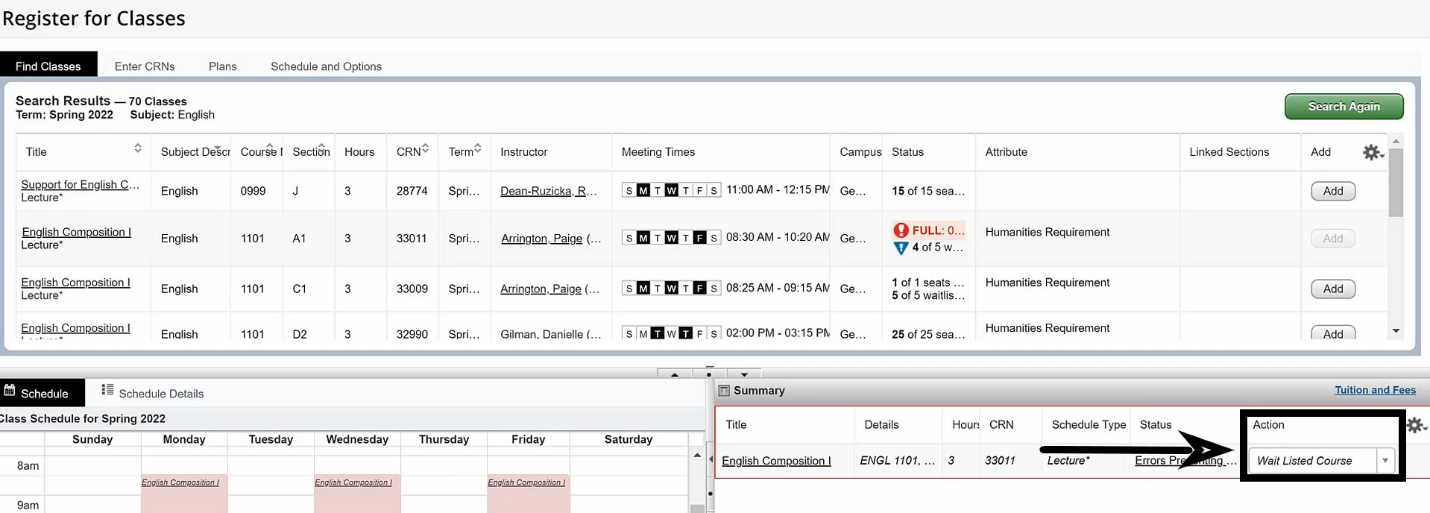
Step 7. Should you find the course you want to register for is “FULL: 0 seats available” as labeled in red highlights in the Status Column (11th column) but has an upside down blue triangle symbol with an exclamation mark inside followed by a number then this means the course has a waitlist. If the waitlist is not full, as detailed in the Status column, then you may apply for the waitlist.
Step 8. Click Add in the last column labeled Add.
Step 9. Two panels should appear in the bottom of your screen, showing your pending schedule in the left panel and the summary of the course(s) in the right panel.
Step 10. If all looks correct, register the course as a waitlist by going to the Action tab in the lower right panel of your screen and selected the Waitlist option. Click submit to register as a waitlist course.
Video: Registering for a course with a waitlist