Understanding How to Import Grades into the Banner Faculty Grade Entry (FGE) Module
Grades for class rosters can be exported from the Banner Faculty Grade Entry (FGE) module using the options in the Tools menu.
The module includes a wizard for guiding users through the process of importing, including the mapping of columns.
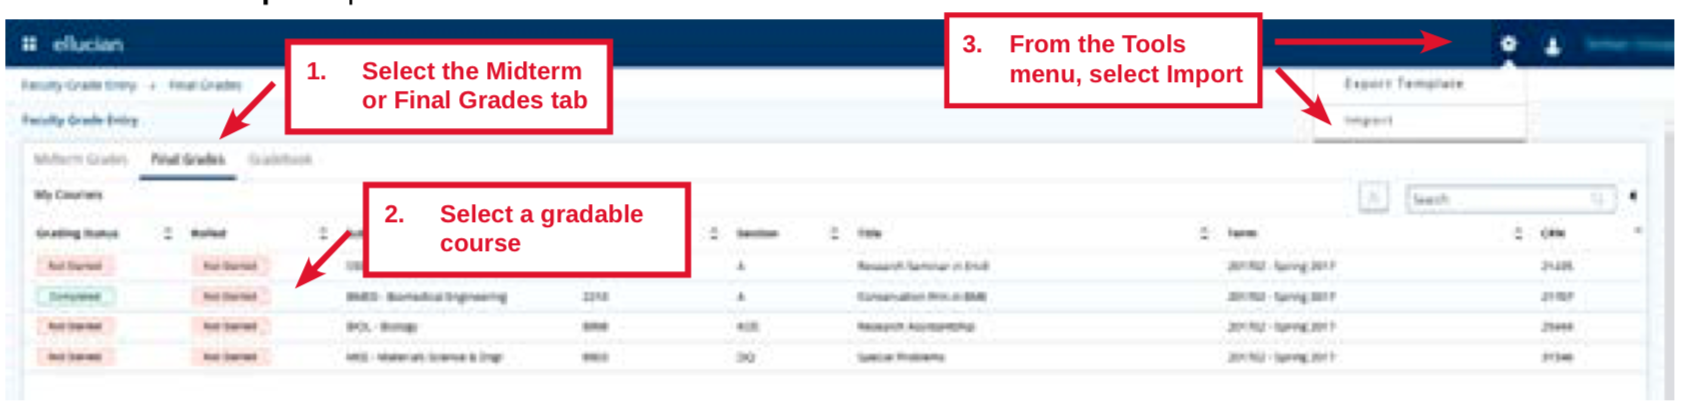
Selecting a Course for which to Import Grades into the Banner Faculty Grade Entry (FGE) Module
- Select the Midterm Grades or Final Grades tab.
- Select a Course from the list of gradable courses.
- Select the Import option from the Tools menu.
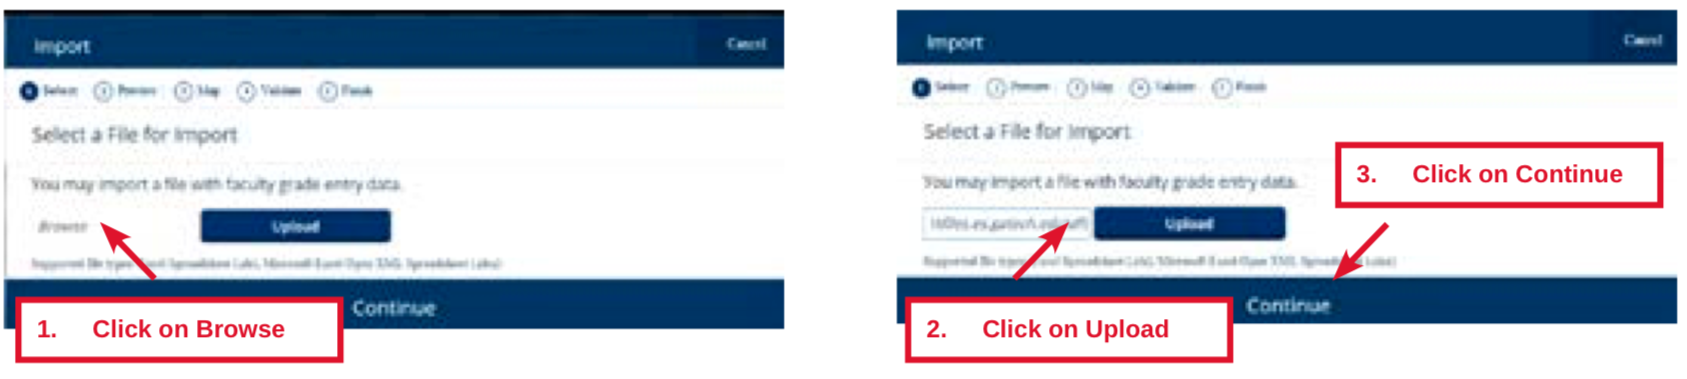
Selecting a File to Be Imported into the Banner Faculty Grade Entry (FGE) Module
- Browse for a file to import by clicking "Browse."
- Then, click "Upload."
Be sure the spreadsheet has a column for the "Last Day of Participation" for any student receiving a final grade of "F" or "I."
- Select "Continue."
There are multiple worksheets in the spreadsheet file, choose one to import.
- Preview the file by selecting the appropriate worksheet of the spreadsheet to import.
The "My spreadsheet has headers" indicator is checked by default. If there are no headeres, un-select the indicator.
Columns are sortable. To sort, click on the sorting arrows in the column headers.
Use the "Go Back" button to choose a different file or use the "Cancel" button to stop the process.
- Click "Continue."
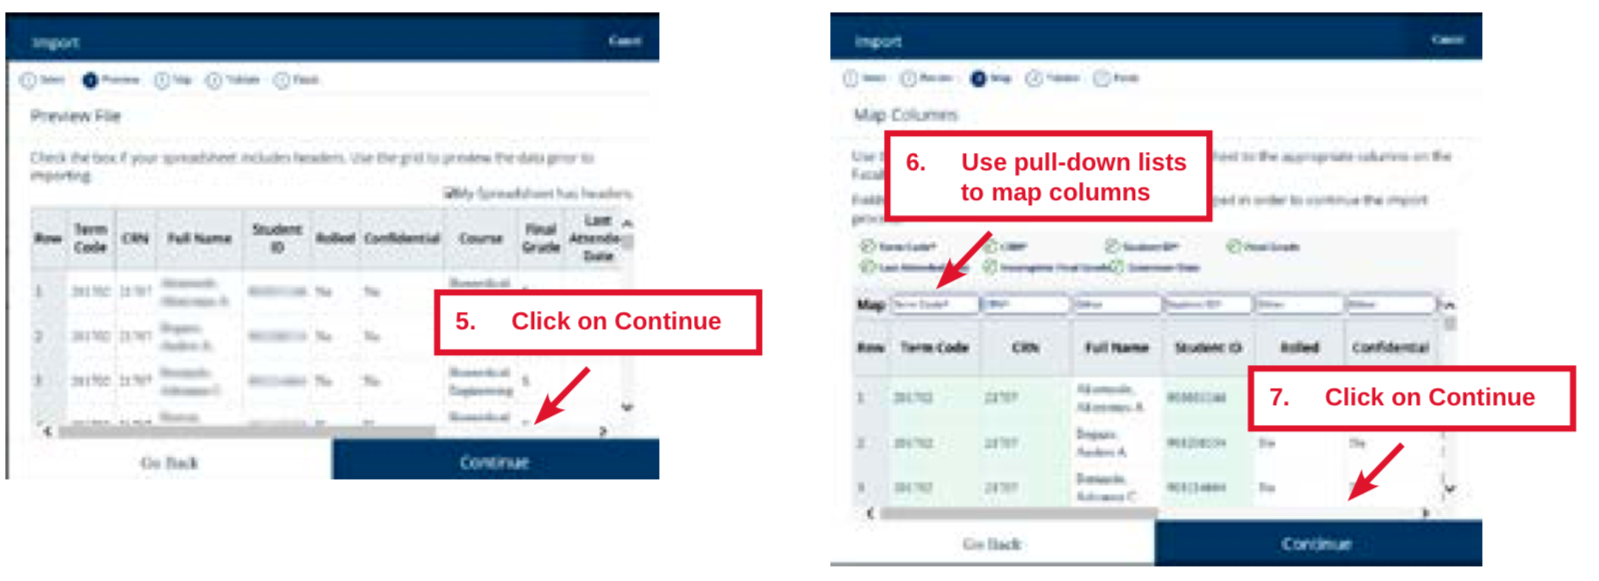
- Use the dropdown selectors to map the spreadsheet columns to the module's columns.
The Student ID and either the Final Grade or Midterm Grade must be mapped for the "Continue" button to be active. Last Attend Date should be mapped to the column containing "Last Day of Participation" data. After reviewing the mapped columns, the user must click "Continue" to import the data. A green check mark appears atop the wizard for each column that has been mapped. Columns the user does not intend to import must be set to "Ignore." Use the "Go Back" button to choose a different file. Use the "Cancel" button to stop the process.
- Select "Continue."
- Review the data summary to see the data that will be imported, then click the "Import" button.
The summary lists the number of records that will be imported and the number of errors for records that will not be imported. Use the "Go Back" button to re-map the columns or view the import summary. Use the "Download the validation report" link to view an Excel spreadsheet with the error details by record. The default title for the validate report uses the term code, subject, course number, section number, and "_Validation_Report" in the file name. For example, 2018_02_Biomedical_Engineering_2201_Validation_Report.xls. You can save the validation report and download it to your desktop. You can correct any errors, save the document, and start the import process again, if needed.
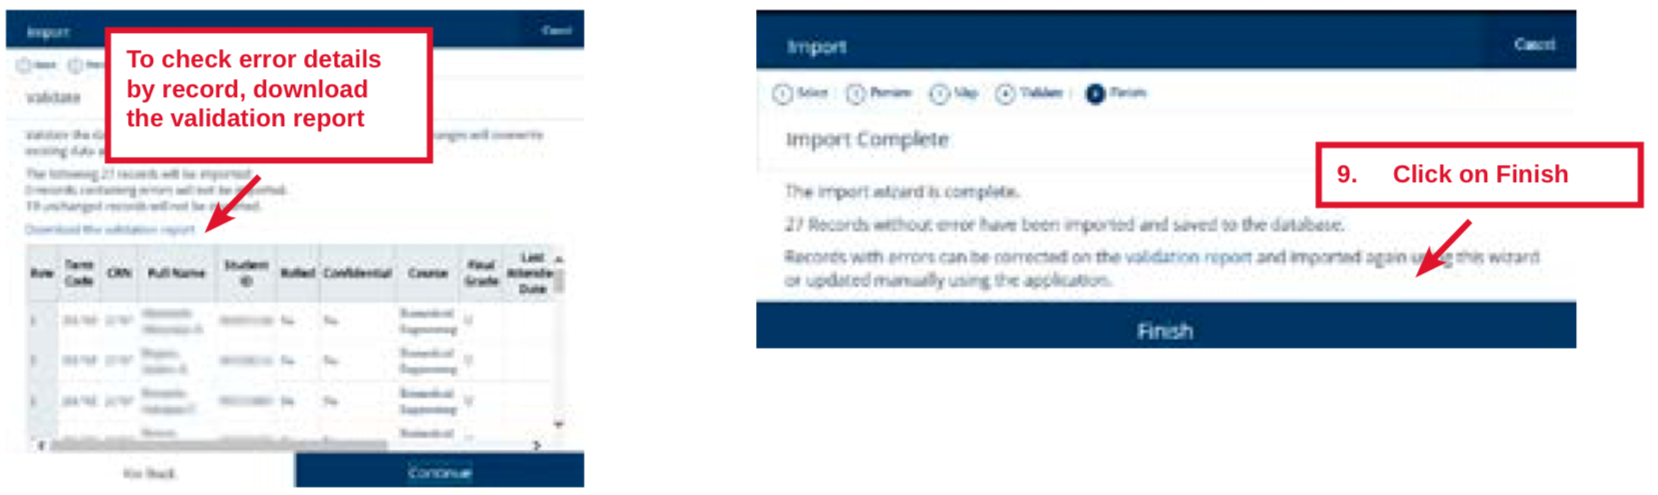
- The Notification Center displays the number of records imported successfully and saved as well as the number of unchanged records that were not imported. Click "Finished."
After grades are imported, the information in the Course Details area is updated, and it gives the number of grades (Midterm or Final) still yet to be entered. The bar under Grading Status will be completely green if all grades have been entered.